Candy Wreath Tutorial
Candy Wreath Tutorial

I’ve been dying to make a candy wreath since before Halloween but I just haven’t had the time. So I was really excited to finally be able to make one last week!! If you would like to make one too, here’s what you will need:
– Two 20oz bags of Peppermint Starlights
– One 16″ styrofoam wreath form
– One 20 yd. roll of 1 1/2″ floral ribbon
– One 4 yd. roll of 1 1/2″ decorative ribbon
– Hot Glue
– Shellac (optional)
I started by wrapping the wreath form with the floral ribbon.


This serves two purposes:
1. It gives the hot glue something less porous than styrofoam to adhere to
2. There will inevitably be gaps between your starlights. The ribbon will be more attractive looking than the raw styrofoam.
Next unwrap your starlights and begin to hot glue them to wreath.

Instead of gluing in rows, I glued more in a brick pattern. The starlights are not a uniform size so there will be gaps and areas where the pattern doesn’t exactly line up. Do not be alarmed.
One of the places where your starlights will probably not line up properly is the outside edge of the wreath. So, I cut some of my remaining floral ribbon down to 1″ and gently glued (using as little glue as possible) it to the outside edge.

(** NOTE** If you will be hanging this wreath in a warm or damp climate, I highly recommend shellacking it, to prevent the candies from melting, prior to adding any of the decorative ribbon.)
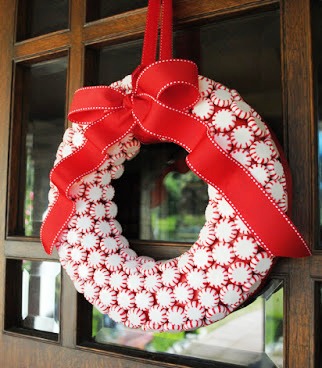
Then I wrapped a 3 1/2′ length of my decorative ribbon around the top of my wreath and tied a bow. Next I gently glued the loops and the lengths of the ribbon into an attractive shape. Finally I threaded a length of the remaining decorative ribbon through the bow and tied it off so that I could hang it on my front door.

So, there you have it. Happy holiday wreath making!!!